웹디자인 강의
3DSMax 귀여운 물고기를 만들자(2)
2004.02.08 15:26
자 이제 물고기를 부~드럽게 만들어야죠^^
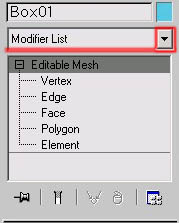
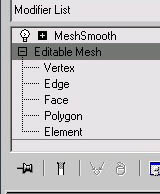
클릭하면 list가 쫙나오죠?
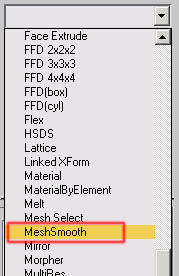
mesh smooth 클릭
밑에 쫌 내려가 보면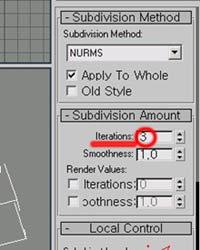
lterations값을 3정도만 줍니다
그이상 주면 컴터가 다운될수 있으니 주의!
그러면 물고기가 부~드러워 졌죠??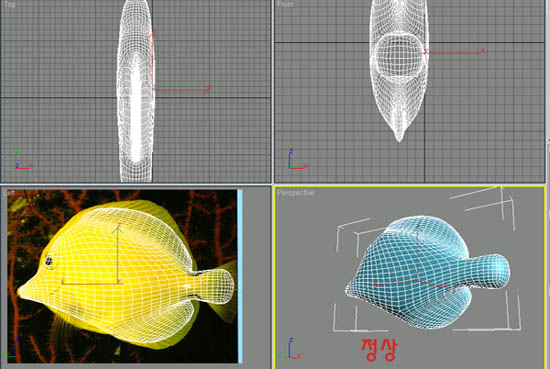 이것처럼 되었나요?
만약!!!!

이것처럼 파랗게 징그럽게 되었나요? ㅡㅡ;;
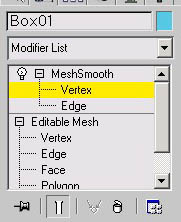
editable mesh 를 안끄고 mesh smooth로 넘어왔기 때문입니다
이것처럼 노란불을 회색으로 끄고 meshsmooth 클릭
정상으로 돌아왔나요??^^
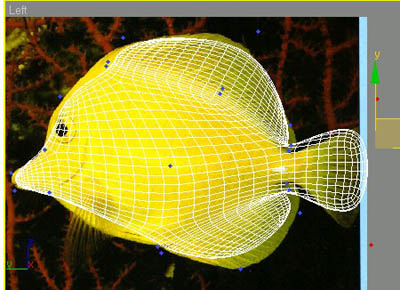
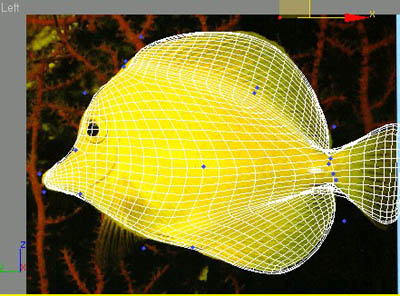
자 이제 Left화면을 보니 사진보다 좀 작게 되었구..
꼬리 부분이 둥글게 되었죠?
그럼 smooth의 점으로 가겠습니다
vertex클릭
꼬리 부분부터 수정하면
 화면처럼 꼬리 끝점을 드래그하여 두점을 선택합니다
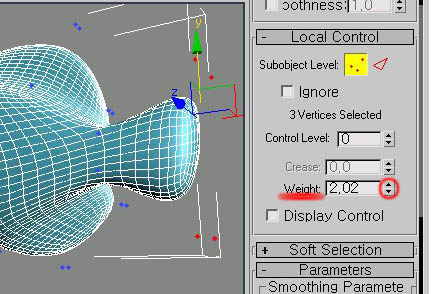
weigth값을 좀 올려줍니다
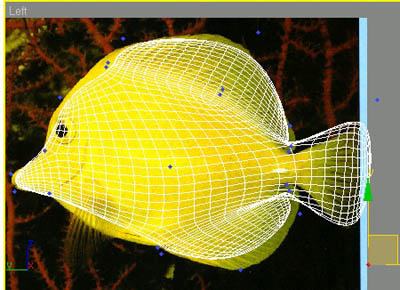
Left화면을 보면서 조절 합니다 꼬리 끝으로 치우치는걸 볼수 있습니다
그런다음 Left 화면에서 파란점을 사진에 맞게 잘 옮겨 줍니다
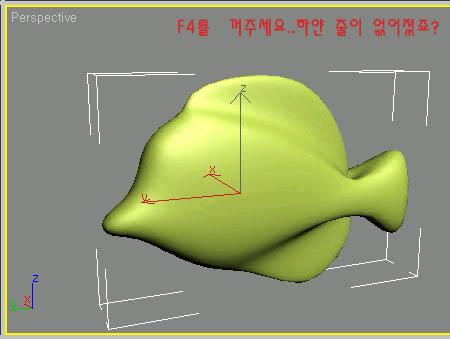
자 거의 완성 ㅡㅡ;;
perspective화면에서 F4를 눌러줍니다
그럼 물고기 모양이 완성!!
이제 재질을 입혀야죠?^^
다음 강좌로..
클릭하면 list가 쫙나오죠?
mesh smooth 클릭
밑에 쫌 내려가 보면
lterations값을 3정도만 줍니다
그이상 주면 컴터가 다운될수 있으니 주의!
그러면 물고기가 부~드러워 졌죠??
이것처럼 되었나요?만약!!!!
이것처럼 파랗게 징그럽게 되었나요? ㅡㅡ;;
editable mesh 를 안끄고 mesh smooth로 넘어왔기 때문입니다
이것처럼 노란불을 회색으로 끄고 meshsmooth 클릭
정상으로 돌아왔나요??^^
자 이제 Left화면을 보니 사진보다 좀 작게 되었구..
꼬리 부분이 둥글게 되었죠?
그럼 smooth의 점으로 가겠습니다
vertex클릭
꼬리 부분부터 수정하면
화면처럼 꼬리 끝점을 드래그하여 두점을 선택합니다weigth값을 좀 올려줍니다
Left화면을 보면서 조절 합니다 꼬리 끝으로 치우치는걸 볼수 있습니다
그런다음 Left 화면에서 파란점을 사진에 맞게 잘 옮겨 줍니다
자 거의 완성 ㅡㅡ;;
perspective화면에서 F4를 눌러줍니다
그럼 물고기 모양이 완성!!
이제 재질을 입혀야죠?^^
다음 강좌로..
댓글 2
-
VeilSide™
2004.02.17 18:15
오랫만에 올라온 맥스 강좌~ㅋ -
박영진
2004.10.28 19:37
이것은... 붕어싸만코..ㅋㅋ 괜찮네요...ㅋ ㄱㅅ 좋은 강좌 해주셔서..^^